Who are the best DBD killers? Seven years in, the Dead by Daylight character roster is bigger than ever, boasting a massive 33 killers at the time of writing, and a further 37 survivors. Thanks to that huge list of names, it’s certainly difficult to keep track of who you should main.
Among the best PC games out there, the joy of asymmetrical horror games has always been the ability to be the bad guy. While there’s certainly something thrilling fighting for your life in survival games (there must be a reason we all wonder how we’d do in a zombie apocalypse, right?), nothing gets the heart racing like shirking the lawful-good responsibilities of real life and taking on the role of a blood-thirsty killer. Every one of the following DBD killers has their own terrifying unique power, from ranged axe throws, to infectious bile and close-range chainsaw attacks. But which is best? Find out with our Dead by Daylight killers tier list.
DBD killer tier list
The tier list below considers Behaviour’s difficulty rating for each killer, their unique power, and the strength of that power when played well. For example, The Hag and The Nurse are in S Tier, but these won’t be great picks for beginners thanks to their difficult abilities and attacks. In the hands of a DBD veteran though, they’re among the best characters available. Killers’ individual perks have only slightly been taken into account, as they can be unlocked and used interchangeably with any killer build.
There have been some major changes to some killers since this was last updated, so we might swap some things around once we’ve had some more hands on time with them. The long-hated Skull Merchant has seen the biggest changes, and most likely will change position.
Here is our Dead by Daylight killer tier list:
| Tier | Character |
| S | The Hag, The Nurse, The Wraith, The Huntress, The Spirit |
| A | The Xenomorph, The Singularity, The Blight, The Hillbilly, The Ghost Face, The Executioner, The Mastermind, The Knight |
| B | The Trickster, The Shape, The Doctor, The Nemesis, The Artist, The Pig, The Skull Merchant |
| C | The Legion, The Dredge, The Plague, The Deathslinger, The Oni, The Twins, The Trapper |
| D | The Cannibal, The Nightmare, The Clown, The Demogorgon, The Onryo, The Cenobite |
S-tier

The Hag (Very Hard)
If you play as a survivor regularly, two terrifying killers you’ll come up against frequently are The Hag and The Nurse. Popular choices among long-time players of the asymmetrical horror game, these two are hard to escape when controlled by the right player.
While both are “very hard” according to Behaviour’s rating, we consider The Hag as slightly easier thanks to her teleportation ability, Blackened Catalyst. The Hag, AKA Lisa Sherwood, has the power to “shape mud to her will”, drawing Phantasm Traps into the ground. When a player stands on one of these traps, The Hag can instantly teleport to them, provided they are within 40 metres. Hide Phantasm Traps around Generators and Hooks to catch survivors out when it will affect them most, but if they are placed in plain sight, survivors will avoid them as they’re not too well disguised. Blackened Catalyst is hard to get used to as you need to act quickly, and orientate yourself after teleportation, but once mastered, The Hag is a powerful, Entity-pleasing killer.
On PC, you will not have access to The Hag automatically, and they must be purchased from the in-game shop.

The Nurse (Very Hard)
Like The Hag, The Nurse has the ability to teleport quickly across the map with her Blink ability, Spencer’s Last Breath. The Nurse can even chain Blinks together to cover large distances. The downside to this power, though, is the fatigue effect placed on The Nurse after blinking, so you will need to take some time to master the perfect timing of this skill, as a false move will slow your movement speed and allow survivors to escape. Use it correctly and you could find yourself sacrificing all four survivors in record time.

The Wraith (Easy)
One of the easiest killers available, and yet still used by professionals and long-time players, The Wraith really is a jack-of-all-trades killer, and incredibly popular to boot. Using his Wailing Bell power, The Wraith becomes almost completely invisible to survivors. If you’re paying close attention to your surroundings, he can be vaguely made out as a blur, but this means he can easily sneak up on players engrossed in repairs or healing. While cloaked, The Wraith also has increased movement speed, making it easier to close the gap on wily players. The caveat is that he’s unable to injure or down them while cloaked. To do so, you must first uncloak, which slows The Wraith’s movement speed back down slightly.
While The Wraith is a superb killer for sacrificing survivors quickly, the trick to mastering the killer comes with knowing exactly when to cloak and uncloak. Also, don’t get tripped up by not holding the action button long enough to uncloak, as this will give your location away, but you still won’t be able to attack.

The Huntress (Moderate)
While every other S-tier killer is a close-range melee attacker, The Huntress stands out with a ranged weapon, her Hunting Hatchets. This power makes for a truly top-tier killer, as an eagle eye and a sharp shot can down survivors within seconds of starting a match. You still need to land two hits to down a player, but there is only a slight cooldown between throws and this can be reduced with add-ons. Injuring with the first hatchet will also slow a survivor’s movement speed as normal, so you can then go after them with your basic melee attack instead.
The greatest benefit to a ranged attack is the ability to hit a survivor with a pallet or window between you, but be careful not to run out of hatchets. The Huntress is limited to five Hatchets in hand at a time (unless you have the Leather Loop add-on), so be sure to regularly restock your hatchets from lockers.

The Spirit (Hard)
Now, we didn’t really want to put The Spirit in S-tier simply because Rin Yamaoka, like The Hag and The Nurse, also has the power to teleport across the map. However, there is no doubt that, when mastered, The Spirit is another top-tier DBD killer, so we couldn’t really bump her down. Clearly there’s just something about the ability to fast travel across the map that makes these killers some of the best.
In contrast to those above, The Spirit moves across the map in her spirit form, leaving her almost invisible to a survivor’s eye. To counter that extremely powerful ability, survivors also become invisible to The Spirit as she moves through an alternate plane. As The Spirit phases through the map, she moves at a faster rate than normal and can still see scratch marks and other environmental hints such as spooked wildlife and moving generators, clues to where survivors may be lurking. Once The Spirit then reappears in her new location, she briefly retains her speed boost, making this the perfect time to catch unsuspecting survivors off guard. As teleporting killers go, The Spirit is slightly easier for a beginner to master as the camera moves with her across the map, rather than simply reemerging in a new location – often discombobulated.
On PC, The Spirit is another killer that must be purchased from the in-game shop.

A-tier
The Xenomorph
The Xenomorph has come straight in near the top of our DBD killer tier list as it is without a doubt one of the best killers around right now. The only reason we’re leaving this killer out of the S-tier rank is because we’re trying to base this decision on the base character and not their perks and add-ons, but with those, our Alien friend would take the number one spot.
As a standalone character, no matter which perks you choose to kit it out with, The Xenomorph is still incredibly strong thanks to its base kit survivor aura reading abilities. While in underground tunnels, The Xenomorph can see player footsteps if they cross your path above ground. You can also hear generators while underground, too. This gives you the ability to locate players incredibly easily – and within moments of the trial start. Come out of the tunnel, and if you’re close enough those survivors might trigger Killer Instinct too, just adding to the already OP aura reading capabilities. The only thing holding this killer back from being too good is its slightly lower base speed and those pesky flame turrets. That said, as discussed in our launch day opinion of the alien, those could still be buffed somewhat and The Xenomorph would still be a strong attacker.
If you wish to crawl around underground as the Xenokitty, I mean, Xenomorph, you must buy it on its own or as part of the Alien chapter.

The Singularity (Hard)
The Singularity is the newest killer, added alongside Gabriel Soma in the End Transmission chapter. This chapter is the game’s first foray into sci-fi horror, and the new genre (and cool new map) had fans excited.
The new killer has jumped right in near the top of the tier list as he is incredibly strong – so strong, in fact, that there is only one small reason keeping his from S-tier in our opinion, and that’s your own ability and knowledge of Dead by Daylight maps. The Singularity works exceptionally well as an M1 killer (we even got a win without any perks in our first Singularity game), but that would be a bit of a waste of his power.
His power allows you to place ‘cameras’ around the map in biopods, using them to spy on, locate, and even inflict the ‘Slipstream’ effect on survivors. Similar to The Twins, The Singularity will leave this motionless body on the map while you switch between camera views – but you need to remember where they all are in relation to one another and your own position to use them effectively or it can be a bit discombobulating.
One of the best uses of The Singularity’s power is the ability to teleport to survivors who are slipstreamed. Get a survivor in front of you with a biopod attached to them, and you can catch them in your sights and jump ahead quickly, breaking any pallets that might be at your destination. Survivors can counter biopods and slipstream by utilising EMP devices located around the map.
The Singularity can be purchased on his own, or as part of the End Transmission DLC.

The Blight (Very Hard)
The Blight is similar to The Nurse and The Hag in that it is incredibly difficult to master, but almost unstoppable once you do so. The Blight’s power, Rush, enables you to move extremely quickly across the map, closing in on survivors with little effort. While you can’t attack a survivor on your first Rush, slam into a wall or other obstacle to activate Lethal Rush, another Rush action during which you can attack, giving two valuable chances to close the gap between you and your victim. Careful though, if you miss a wall or obstacle on your first Rush, Blight will be briefly fatigued, and your survivor will have their chance to get away. Expect your early Blight matches to be painful, but sticking through it to get used to his incredibly quick speed will be worth it.
The Blight is another character that needs to be bought on PC before you can use them.

The Hillbilly (Moderate)
The Hillbilly was Dead by Daylight’s answer to Bubba Sawyer before the licensed Leatherface chapter came about. As such, you’d be forgiven for thinking he’s the same killer, or at least very similar. However, The Hillbilly is still the best of the two, with his Chainsaw Sprint power allowing him to close the gap between himself and a survivor, before dealing a devastating blow. The killer aspect of the Chainsaw Sprint is that a successful hit will place even a healthy survivor straight into the dying state, making The Hillbilly an incredibly powerful villain for quick hooks. Just be careful with your aim, and try for a straight line between yourself and your victim when activating your sprint action. Why isn’t The Hillbilly S-tier? Because clever survivors will know you’re coming and can dodge at the final second.

The Ghost Face (Hard)
The Ghost Face is undeniably one of the most recognisable characters in Dead by Daylight, despite not actually being an officially-licensed chapter (hence the intentional Ghost Face format of its name). Heavily influenced by the original horror villain though, The Ghost Face is one of the few stealth killers in Dead by Daylight.
One of the only killers in the game that is able to crouch, The Ghost Face can easily creep up behind unsuspecting survivors, especially those concentrating on Generator repairs alone. Activating his Night Shroud power also renders him Undetectable, and that lack of Terror Radius makes it even more difficult for survivors to know he’s behind them. While crouched and hidden, Ghost Face can Stalk survivors, and a complete Stalk action will mark the survivor and leave them Exposed for a time. With that in mind, all of this doesn’t change the fact that there is no bonus to Ghost Face’s only method of attack, which is a simple melee, so the only way to succeed with this killer is to master that stealthy Stalk ability.
Even though it isn’t an official crossover, you’ll still need to purchase The Ghost Face from the in-game shop on PC.

The Executioner (Very Hard)
Fans of the Silent Hill franchise will instantly recognise Pyramid – The Executioner – from the official Silent Hill chapter. The Executioner is a complex killer to play, with a range of actions available, but is an absolute powerhouse when played well.
Without going into too much detail with all of The Executioner’s components, the most important things to know about are Torment and Final Judgment. Use Pyramid Head’s power, Rites of Judgement, to carve an opening into the ground – particularly useful near hooked survivors or generators, or across doorways. If a survivor walks through this, they will be inflicted with Torment, which means they can be killed immediately (or Mori’d) if they have entered the struggle phase/second phase on the hook or in a cage – this is Final Judgment. Therefore, the best way to play The Executioner is to try and hook all survivors twice, rather than prioritising that third and final capture. Then you can go and deliver that Final Judgment.
The Executioner is yet another character that must be purchased from the in-game shop on PC.

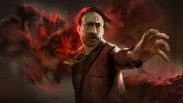
The Mastermind (Moderate)
Project W’s Wesker, or The Mastermind, is already becoming known as a particularly strong killer. Combining a ranged attack with the ability to instantly carry a survivor when played well, there is no real downside to The Mastermind.
Wesker has a standard melee basic attack, but can also lunge at survivors with his power, Virulent Bound. With a straight run at the Survivor, Wesker slams them against the wall, causing them to lose a health state, but even if you collide with an obstacle, you will still cause damage to the survivor. Either way, Virulent Bond causes the survivor to become Infected with the Urobros Virus. The Infection will slowly increase unless the survivor uses a First Aid Spray – a fully-infected Survivor can be instantly carried upon another successful attack, while using the spray reveals their location, so again, there’s no downside to using Virulent Bound. Once you Master the Mastermind, he really is one of the deadliest DBD killers.
To infect survivors with the Urobros Virus, you must buy Wesker from the DBD in-game store either on his own, or as part of the Project W DLC.

The Knight
The Knight is a tricky killer to place on this list, because he’s another that’s incredibly hard to get to grips with – perhaps the most difficult so far. But, while the Knight’s power is complex, it can be devastating for survivors when mastered. You see, the Knight isn’t alone, and his power ability summons guards to do his bidding: breaking pallets, damaging generators, and hunting survivors. Unlike The Twins, they’ll do this on their own, essentially creating a game with two killers – if you can use it right. You can either use this to take a survivor from healthy to dying in one fell swoop (one hit from a Guard and one from you), or simply leave your Guard to do it’s thing while you go on the hunt for another survivor entirely.
The Knight is available as part of the Forged in Fog chapter, but needs to be purchased before you can start summoning your guards.

B-tier
The Trickster (Moderate)
A fan-favourite for his boyish good looks, The Trickster is surprisingly unpopular as a main. His ranged ability, Showstopper, allows The Trickster to throw multiple sharp blades at survivors, even over pallets and through windows. As a survivor up against him, he can sometimes feel impossible to avoid as your Laceration Meter rapidly increases. Every successful hit then charges The Trickster’s Event Meter, which, when full, unleashes an even more deadly onslaught of throwing knives. However, Showstopper slows The Trickster down so significantly that, without good aim, there’s no real benefit to him at all. If you do want to run The Trickster, perhaps try a build that will help in other areas, such as sabotaging Generator repairs and revealing survivor locations.
Unfortunately, if you do fancy yourself as a sharpshooter with The Trickster, you’ll need to pick him up in the shop on PC.

The Shape (Moderate)
Michael Myers, known in-game as The Shape, is a long-game killer, so if you’re anything like us and struggle to locate survivors, this is probably not the killer for you. However, if you’re willing to bide your time with this stealthy stalker, you can turn him from a figure in the shadows to a killing machine in the match’s final moments.
Activate The Shape’s power, Evil Within, to see and stalk your prey from a distance. Simply watching your victims as they go about their business will upgrade your Evil Within abilities, becoming more powerful with each level. Evil Within I grants the Undetectable Status, but decreases basic attack lunge and movement speed. Evil Within II reduces your terror radius, while increasing movement speed and attack lunge. Hang tight until Evil Within III, though, and all survivors will be affected by the Exposed status effect, meaning you can down them with one hit. Evil Within III will go back down to level two after 60 seconds, and it’s worth knowing that survivors will hear an audio cue each time Evil Within levels up. Down all four while they’re exposed though, and you could end the game within seconds.
To take advantage of The Shape’s potential for a speedy ending on PC, you’ll need to buy him from the in-game shop.

The Doctor (Hard)
The Doctor is another killer with only a basic attack, but if you make the most of his special abilities, he’s great for locating survivors and slowing their progress.
The Doctor’s power, Carter’s Spark, affects nearby survivors with Madness, which gets worse each time they are hit with it. The further they descend into madness, the more difficult skill checks become, with failed skill checks revealing their location and affecting Generator repair progress. Each time a player is hit with Carter’s Spark, they also scream, revealing their location, and Madness levels II and III also trigger illusions of the Doctor, which again help you locate a player’s approximate position. Once you master the accuracy of The Doctor’s Spark, you can delay the survivor’s progress while also keeping track of where they are, putting the game entirely in your favour.
An apple a day doesn’t keep The Doctor away in this case – he’s not coming anywhere near you unless you fork out and buy him from the in-game shop on PC.

The Nemesis (Hard)
We know DBD fans love a Resident Evil crossover, with the first DBD “sequel” bringing Resi back in Chapter 25. The original chapter, though, brought us Nemesis, another killer with difficult abilities to master, but incredibly fun to play.
The Nemesis’ T-Virus power allows him to infect survivors, which counts as an additional health state, but victims will become injured with a second hit. This status is inflicted with The Nemesis’ tentacle, meaning it’s a ranged attack that can be used over pallets and through windows. The more successful T-virus infections you make, the more your powers grow, eventually adding the ability to break pallets and increase movement speed. Then there are The Nemesis’ zombies, which not only infect survivors who get too close and can therefore make them leave generators, but also alert you to their location if you pay attention.
You’ll need to pay up for The Nemesis on PC too, because they aren’t available automatically.

The Artist (Moderate)
Another killer with a ranged attack of sorts, The Artist’s precious swarm of crows can do a lot of the work for you. Send out one to three crows with Birds of Torment and they’ll fly out in front of you, inflicting damage to any survivors in their immediate path. Their flight will continue, but instead of injuring distant survivors, they will instead attract a swarm around the survivor’s head, alerting you to their location. This combination makes it quite easy to take a few survivors down in close succession, but you still need to get up close to use your basic melee attack, and misplaced crow attacks will not only do nothing, but will alert survivors’ of your location to boot.
Put your paint brushes away and get your wallet out, because you’ll need to pay for The Artist on PC too.

The Pig (Hard)
Saw’s Pig is another interesting killer in that, used well, it can lead to success, but if used incorrectly, all it does is prolong your agony instead of the survivors’.
The best process for success is to try to get all players locked up in a Reverse Bear Trap as quickly as possible. These traps become active as soon as a Generator is completed, and start counting down to a deadly attack. Not only do they take time to remove, but there are a limited number of Jigsaw boxes at which survivors can do so. This is all time spent not repairing generators. Plus, if multiple players are trapped at the same time, they may have to travel further to find free Jigsaw boxes, wasting further time. If that countdown reaches the end before the trap can be removed, the survivor is instantly sacrificed, even if they’ve never been hooked. To counter the incredible power of these traps, you are limited to four per match, and they can be quick to remove – depending on luck.
This very unique killer also must be purchased from the shop on PC before you can play as them.

The Skull Merchant (Hard)
The Skull Merchant has been tweaked a couple of times since she was added to the game to a very negative reaction, and is now a little better all-round. A hard killer to get to grips with, you need to have a good few eyes all around you, but that’s what your drones are for – once you get used to them. It can be slow to interact with the Skull Merchant’s drones, taking up valuable hunt time, but once you’re skilled with them, they can block off generators and reveal survivor locations, making this killer lethal in the right hands.
Since drones can expose survivors after a while, the Skull Merchant comes highly recommended if you often find yourself looped by tricky survivors. She’s slow, which can be rough, but keep a drone on you at all times to place when you’re being looped round the shack or a pallet, and the survivor will either have to leave or risk becoming exposed, meaning you can kill them with one hit. This is undeniably the best use of the Skull Merchant.
You can only use the Skull Merchant is you purchase her in the in-game shop, or as part of the Tools of Torment chapter.

C-tier
The Legion (Easy)
As a survivor, you may find yourself up against The Legion a lot, and you may even lose to them a lot, but that doesn’t automatically mean they’re a good killer. While The Legion is great for massively slowing down progress for survivors and prolonging the game, it’s difficult to actually down and hook victims, so after a long slog from both parties, it could end either way.
The problem with The Legion is that while their power, Feral Frenzy, increases movement speed, it can be quite hard to control. On top of that, their Special Attack, Feral Slash, requires five hits to down a survivor, rather than the usual two. If you get stunned or miss a hit, Feral Frenzy will come to an end, stunning you again and giving survivors the chance to get away and heal. The best play with The Legion is to simply use Feral Slash once and go on the hunt for another victim, inflicting the first with Deep Wound. Deep Wound is an additional injured state with a timer, forcing the Survivor to go and heal – or get healed – lest they enter the dying state once the timer runs out. All this time, they’ll be wasting valuable Generator repair time.
Despite The Legion being a popular pick, they are another that requires purchasing from the in-game shop on PC.

The Dredge (Moderate)
The Dredge arrived in the Roots of Dread chapter, and has some very unique abilities. However, played well, The Dredge can be unstoppable.
The main ability to utilise when playing The Dredge is its Special Ability, The Gloaming. Leaving a Remnant behind, The Dredge is able to teleport into any visible locker – which is incredibly useful when combined with the Darkness Revealed perk (yes, we’re actually considering perks in this entry because of how effective the combo is). This reveals any survivors standing within a small distance from a locker, so play it right and you can reveal a survivor’s location before teleporting directly to that locker and taking them by surprise. This is even better when Nightfall is activated, plunging survivors into Darkness and removing The Dredge’s Terror Radius for 60 seconds. While this all sounds good, this only helps to locate Survivors. The Dredge doesn’t have any special attacks to help take them down, so you already need to be good in the killer role for it to be of much use.
The Dredge also must be bought from the in-game shop before you can use them on PC.

The Plague (Hard)
Despite the protective nature seen in her backstory, Adiris, The High Priestess of Babylon, uses her infectious plague to cause harm to survivors. Another ranged attacker, The Plague might be good for new killers who dislike melee attacks, however, her Special Ability can slow things down, so you might find you struggle to sacrifice all four victims. Vile Purge infects survivors, only injuring them after some time – something they can also remove. A good trick is also knowing that you can ‘infect’ Generators and other environmental objects, to then infect players who interact with it. Survivors can heal themselves using a Pool of Devotion, but this pool can then in turn be used by you as The Plague, to activate Corrupt Purge – the ability to injure with your attack rather than infect.
The Plague must be bought from the in-game shop before you can use her on PC.

The Deathslinger (Hard)
They don’t come much wilder than the Wild West’s Deathslinger. Deathslinger’s incredibly unique power allows him to reel survivors in with a Harpoon attached to his modified rifle. While this doesn’t injure the survivor itself, you can bring them close enough to attack. Doing so while they are speared also inflicts Deep Wound. Try to do this in a clear area though, as survivors can free themselves from the spear, most easily by putting a wall or rock between you and pulling back. While this will inflict Deep Wound, it will also stun you, giving them a chance to get away.
Unfortunately, you’ll need to buy The Deathslinger from the in-game shop on PC before you can start getting wild.

The Oni (Very Hard)
The Spirit’s great-great-great-great-great grandfather, Kazan Yamaoka, is an incredibly powerful killer, able to move across large distances at speed with his Demon Dash, and put survivors straight from the healthy state to dying with his Demon Strike. However, both of these require the absorption of Blood Orbs, left behind by injured survivors, meaning you need to land a lot of successful hits before activating your powers.
Pick up The Oni from the in-game shop before you use him, if you fancy your chances with this very hard killer.

The Twins (Very Hard)
The Twins, Charlotte and Victor, are a somewhat terrifying DBD original. Having not grown properly, Victor emerged from the womb protruding from his sister’s chest.
In DBD killer terms, this means Charlotte can send a screeching Victor scuttling across the map to hunt down victims. All the while, Charlotte will remain in place, as you control her brother. This isn’t a bad power, as you use Victor’s increased movement speed to hunt down survivor locations. Victor can then pounce on the player, briefly incapacitating them, at which point you can start making your way over as Charlotte to finish the job. The downside is that, with a well-timed kick, survivors can stop Victor’s attack and escape, and Charlotte could be a fair distance away on a large map, rendering the power useless.
You’ll need to buy The Twins from the in-game shop on PC if you want to scuttle around as Victor.

The Trapper (Easy)
The Trapper, or Evan MacMillan of the MacMillan Estate, is a melee attacker with an interesting ability that is extremely powerful when used well. As you can expect from the name, The Trapper, well, traps his enemies.
By placing bear traps around the map, you can incapacitate survivors, and when a survivor steps into one, visual and audio hints play, alerting you to their location. Once in the trap, they must attempt to free themselves which can take a few attempts, keeping them out in the open as easy prey. All of this makes Trapper an easy and powerful killer, as long as you use traps effectively, placing them by windows and pallets in strong loops.
Unfortunately, The Trapper has lost some of his shine over the years, slipping down DBD tier lists across the internet. Only having two traps to begin with, the capacity to carry only two at a time (without an add-on), and the rest of them being scattered around the map, unset, means there is a lot of setting up to a successful Trapper match. Now, with more survivor items and perks than when he was first released, you could lose the game before you’ve even started.

D-tier
The Cannibal (Moderate)
The official Leatherface killer isn’t as good as the DBD original, Hillbilly. However, his Chainsaw Sweep provides a wide attack in contrast to Hillbilly’s lunge, so it might work well for you if you struggle to melee hit survivors. The sweeping attack affects the entire area in front of The Cannibal, while his Special Attack reaches the circumference around the killer, so both can hit multiple victims. However, the cons mostly outweigh the pros with The Cannibal, as survivors can see your attack coming and get out the way, movement speed is affected, and there is a heavy cooldown.
You’ll have to pony up if you want to feast on human flesh, as The Cannibal needs to be bought from the in-game shop on PC.

The Nightmare (Moderate)
The Nightmare, AKA Freddie Kreuger, has sadly never been a popular killer, even after a few significant buffs. He can be incredibly fun to play, but he’s not particularly good at sacrificing victims to The Entity.
Freddie’s power puts survivors into the Dream World. All Survivors will enter Dream World automatically every 60 seconds, while hits with a basic attack will force individual suvirovors into Dream World sooner. In the Dream World, players cannot hear Freddie’s Terror Radius and can be affected by Dream Snares, causing the Hindered effect – but that’s about it. You’ll likely find survivors don’t even bother to wake themselves from the Dream World as it’s not that problematic. The main ability Freddie has to his advantage is Dream Projection, or the ability to teleport to and emerge from a nearby Generator. However, blood spurts from said generator, alerting survivors to your plans and giving them a head start to get away.
You can only become a dream eater if you buy The Nightmare from the in-game shop on PC.

The Clown (Moderate)
The Clown’s power involves mixing potions and throwing them – a purple tonic for survivors to affect their vision and movement speed, and a yellow antidote for yourself to increase movement speed. But this is where the difficulty comes in because not only do you need to have excellent aim, it’s also easy to throw the wrong potion when switching between them. Hitting a survivor with the antidote not only increases their movement speed, but also cures them from the intoxicated effect caused by the tonic.
Aptly named with how easy it is to throw the wrong potion, you’ll need to buy The Clown from the in-game shop on PC.

The Demogorgon (Hard)
The Demogorgon is no longer available to purchase from the in-game shop, and is only still playable to those who bought the Stranger Things chapter before the licence expired. However, a DBD Stranger Things leak suggests that the collaboration could return.
If you do have the Demogorgon, it can be quite fun to try, and even quite competitive with some significant practice. Taking things into the Upside Down, the Demogorgon’s power Of The Abyss quite literally sends you upside down. Place two portals, and you can traverse the spooky plane to travel between them. While this is similar to those powers of The Hag and The Nurse among others, it’s not quite as quick to trigger or easy to navigate, making it less valuable than theirs. However, it can be useful in the end game to move between exit doors, just remember to place portals at the doors beforehand.
The best Demogorgon ability is its Special Attack, Shred. Similar to those of The Hillbilly and The Blight, Shred is a lunge attack, closing the gap between killer and survivor and – on a successful hit – places the survivor in an injured or dying state. Combining The Demogorgon’s portals and Shred can make for a powerful killer, but it’s hard to truly master.

The Onryo (Hard)
Sadly, despite Sadako’s highly anticipated release in the Sadako Rising chapter, players haven’t really warmed to The Ring villain as a DBD killer, preferring the unlicensed Spirit knock-off in her place.
Sadako’s abilities are undeniably cool, with TV sets popping up on the map when she’s the killer, allowing her to teleport to them. And while the animation for that is awesome, it’s slow and obvious, so victims can see you coming from a mile away. But not only is it far more difficult to use to your advantage than, say, The Dredge’s similar power, if a survivor removes the tape from a TV, you can no longer teleport to it anyway. Sadako wasn’t loved before The Dredge, and now she’ll be left in her well even more so, unfortunately.
If you fancy giving Sadako a go despite her numerous drawbacks, you’ll need to buy her from the in-game shop on PC.

The Cenobite (Very Hard)
Sadly, Hellraiser’s Pinhead, or The Cenobite, doesn’t raise much hell. While the chains from his Summons of Pain power can be frustrating to a survivor, they don’t really slow them down for long, with the only benefit coming during repairs or healing. However, as soon as a player picks up and completes the Lament Configuration box, which doesn’t take long, the chains recede. While The Cenobite can teleport to a player during the puzzle process, clever survivors can prevent this by completing the Lament Configuration puzzle while you’re otherwise engaged, for example, carrying another survivor. The only real reason to play as The Cenobite is for a bit of fun… and to hear his now infamous voice line, “I came.”
You’ll need to go to the in-game shop on PC for The Cenobite too, unfortunately.
If you just can’t get enough of these enticing executioners, you might be interested in seeing some of them in an altogether different setting, in Hooked on You: a DBD dating sim, which we really enjoyed getting up close and personal with, and is one of our favorite dating sims. Back in the original game, make sure you’ve redeemed the latest DBD codes for some bonus Bloodpoints and Rift Fragments.