Learning how to build a gaming PC isn’t just an immensely satisfying experience, it also means you can tailor your system to your own personal needs. And it’s pretty easy, too. No longer do you have to mess about with jumper switches, northbridges, and clock timings – even SLI is a thing of the past. Nowadays, you just need a bit of guidance, a little patience, and the right components.
You could save yourself the hassle and buy the best gaming PC straight off the shelf, but much like the best gaming laptop, this usually comes with some added tax and you’re stuck with the prebuilt configurations on offer. Sourcing your own components is often cheaper and less complicated to piece together than some Lego sets.
By learning how to make your own gaming custom PC, you can ensure each component suits your requirements perfectly. There are effectively no limits apart from your imagination. It will also foster a beautiful little bond between you and the new gaming PC you helped bring into the world.
Here’s how to build a gaming PC, step-by-step:
- 1. Check your components
- 2. Mount the power supply
- 3. Install the motherboard, CPU, and RAM
- 4. Install your CPU cooler
- 5. Install your SSD or hard drive
- 6. Install your graphics card
- 7. Manage cables
- 8. Test and troubleshoot your gaming PC

1. Check your components
Before all the individual components are tucked away inside your PC, with all their cable ties, it’s a good idea to set up a temporary testbench with all your components, to ensure none are DOA, saving you the hassle of ripping apart your complete PC when you find out something’s wrong.
If you want a proper test bench, then it’ll cost you the same as getting a new PC case, but there’s an easy way to make your own test bench without spending a penny if you don’t build PCs too often. Simply set the motherboard on top of the anti-static sheet it came wrapped in, propping it up with the cardboard box. Then plug in your RAM, CPU, cooler, and graphics card, wire up the PSU, and hook it up to the best gaming monitor and the best gaming keyboard – we’ll show you how to do this later in the guide! You don’t need storage here, as we’re just making sure you can boot to BIOS.
If you can get to the BIOS without a problem, then your parts should be functioning correctly and you can start putting components into your case. Make sure to shut down your test bench, unplug the wires, and set your GPU aside for now, but you can leave your CPU, cooler, and RAM on the motherboard to make installation a little quicker later on. Having problems? Make sure your motherboard doesn’t require a BIOS update to support newer CPUs.

2. Mount the power supply
Now it’s time to start stuffing your PC case with all your shiny new parts. We’ll start with the power supply given that it’s pretty bulky. You’d think it’d be as simple as making sure the logo on the side is the correct way up, but ensuring your power supply is as cool as possible requires a bit more thought. If you have a vent in the space where your power supply sits, like most PC cases nowadays, it’s best to face the fan towards it so it can intake cooler air. If you don’t have a vent, however, then pointing it towards the inside of the case will prevent your power supply from gasping for air.
If you’ve gone for one of the best AIO coolers, then you’ll want to fit your bulky radiator in now too, before your case gets too crowded. Check the radiator to ensure the fans are pushing air the right way – there’s usually arrows telling you which way, but otherwise, the manual in the box should point you in the right direction.

3. Install the motherboard, CPU, and RAM
This is where your machine really starts to take shape, with the motherboard, processor, and memory in place. Having tested these bits earlier they can all be left in the board – dropping the best gaming CPU and best gaming RAM in before installation can save a bit of fiddling around and make sure you don’t accidentally jam an errant thumb into the delicate CPU socket because you can’t quite see what you’re doing.
But first, make sure the motherboard risers are in place in the mounting tray of your case. These are the little stands that the motherboard screws into. Your case will likely have these already in place for an ATX design, but you might have to rearrange them if you’re installing a smaller motherboard. If you were to install the board directly into the metal of the case then you’d probably end up frying the silicon out of your poor little PC bits.
It’s also worth checking whether there’s a cut-out behind the CPU socket in the chassis’ motherboard mounting tray. If there is, you’ll be able to access the rear to adjust the CPU cooler bracket. If there isn’t you’ll absolutely have to make sure this is in place before you fit the motherboard inside the case.

4. Install your CPU cooler
With the CPU cooler’s mounting bracket installed onto your motherboard, you’ll need to get the actual cooler itself sat atop your processor. (We assume you’ve gone for the best CPU cooler, right?).
If you’re using the cooler straight out of the box then it’s likely to have some pre-applied thermal paste and a sticker saying ‘remove before installation’. Make sure to remove one and not the other. If there isn’t any pre-applied paste, you can pick up a tube of thermal paste on Amazon that will last you many CPU cooler installs.
It’s important to note that if you’re planning on using the latest CPUs, you might need to use an upgrade kit with some coolers. Most brands tend to prepare for new releases ahead of time and announce compatibility, but if you own an older version of the cooler then you’ll need to get in touch with customer support to request the new bracket.
Should you choose to install an air cooler rather than the liquid cooler we’ve used then you’ll also have to think about fan orientation here. You want to vent the hot air outside of the chassis, so you’ll need to ensure the fans are blowing air across the heatsink and towards the exhaust fan of the case.

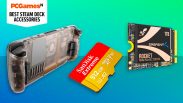
5. Install your SSD or hard drive
We’re installing 2.5-inch SSDs into our build here, but if you’re creating a true budget build or are dropping an old hard drive from a previous PC in there for some data storage, the process is largely the same.
Most chassis these days have tool-less drive bays, meaning you can install a 3.5-inch hard drive in seconds without a screw driver. With a 2.5-inch SSD chances are you’ll have to get your screwdriver out again and attach it to a drive bay caddy that way. For both these drives you’ll want to make sure the power and data connections are facing the back of the case.
If you’ve got your hands on the best SSD for gaming in the form of an M.2 drive, however, these plug into the motherboard directly. Count your lucky stars if you have a motherboard that supports tool-less installation here, as you might otherwise have to contend with fiddly screws that are smaller than anything else in your gaming PC – be careful not to drop them.
To install a SATA or NVMe M.2 SSD, remove the mounting screw from the M.2 slot on your motherboard (which might be attached to an included heat shield), line up the holes in the dfrive to insert the SSD, then secure the SSD by screwing the mounting screw back in.
Using M.2 slots can sometimes take up an entire lane of power, so don’t panic if your 2.5 and 3.5-inch storage stops working. If this happens to you, either consult your motherboard manual to check compatibility or move the SATA cable to another slot and try again. If none of the other slots work for you, it might be a case of choosing which drive is more important to you.

6. Install your graphics card
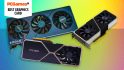
Now’s time to install the supermodel component of your gaming PC: the GPU. Whether you’ve got your hands on the best graphics card or wield an entry level model, this is the part that makes gaming great, delivering pixels at speeds barely conceived by the programmers of yesterday.
Installing a new graphics card is really easy, but we’ve left it until the end because it’s really awkward to work around if it’s sat in the motherboard.
We’ve got a more in-depth guide on how to install a graphics card if you’re struggling here, but it is often as simple as slotting it into the closest PCIe socket to the CPU, then connecting the cable from your power supply.

7. Manage cables
Figuring out how to manage cables properly is an artform in itself, as it can make all the difference. It might look like a spaghetti monster as you plug everything in, but spend enough time with it and it’ll eventually become the pristine PC you’ve always dreamt of.
If you’re using a modular PSU you only need to plug all the relevant power cables into it, which makes this a little less tedious than it can be. So, for us, that’s the main motherboard, CPU, SATA, Molex, and graphics card power cables, which can all be mostly hidden from view through the chassis cable routing systems behind the motherboard.
Now you need to get everything hooked up from your power supply into your motherboard and storage drives. However, there are a few more cables that need to be plugged in still, so this checklist should come in handy:
- Motherboard power
- CPU power
- CPU cooler power
- USB 3.0 for front panel
- USB 2.0 for front panel
- Audio for front panel
- Power, reset switch, etc. for front panel
- SATA power and data
Don’t go using those cable ties until your PC’s running successfully, though, as this can make it difficult to fix any bad actors, should there be any.

8. Test and troubleshoot your gaming PC
When you boot up the PC for the first time in its case, we recommend leaving the side panel off. You want to make sure all fans are spinning, and if something goes wrong, you’ll have instant access to troubleshoot.
If there are any issues, RAM is the best place to start. Memory can be temperamental, so shutting down the machine and reseating your modules may help. Loosening the CPU cooler screws a touch can also be a quick fix, as the mounting bracket can bend the motherboard if tightened too much, which can affect the delicate connections on the PCB.
If the power button is doing nothing at all, it could just be that you’ve plugged the front panel power cable into the wrong header. The best gaming motherboards have a power button built onto the motherboard, which helps troubleshoot this.

If you can get to the BIOS but can’t seem to boot your Windows installation, or any other operating system you might prefer for that matter, then it’s worth checking the boot priorities, or enter the boot menu and manually select the drive that your OS installation is located on.
But, hopefully, everything will be up and running without a hitch and you’ll have a PC gaming setup you’re proud to display on even the best gaming desk. Should your gaming PC run like clockwork, the next step is figuring out how to boost fps so you can get the most out of your components.